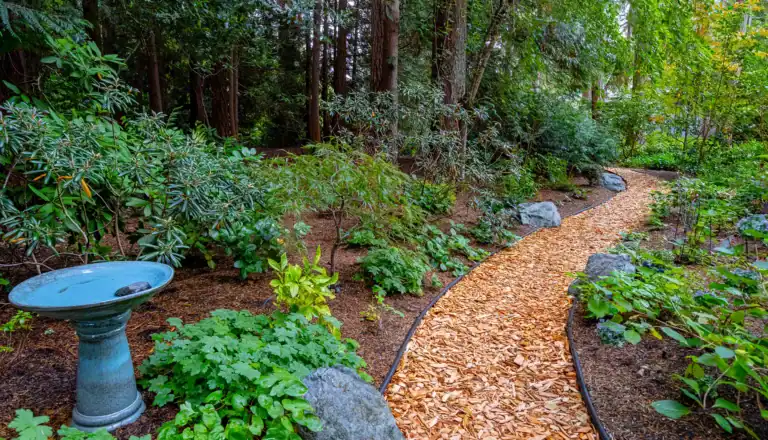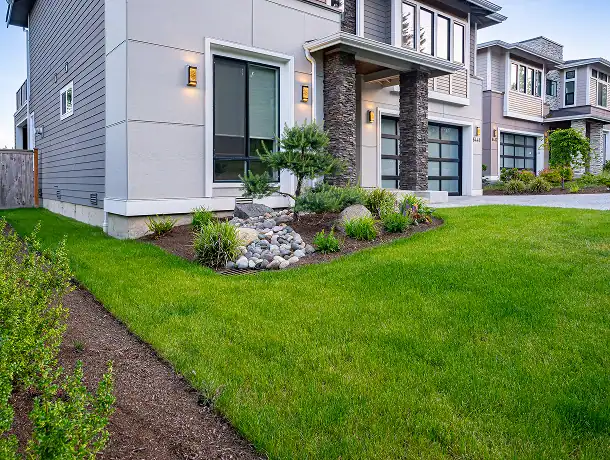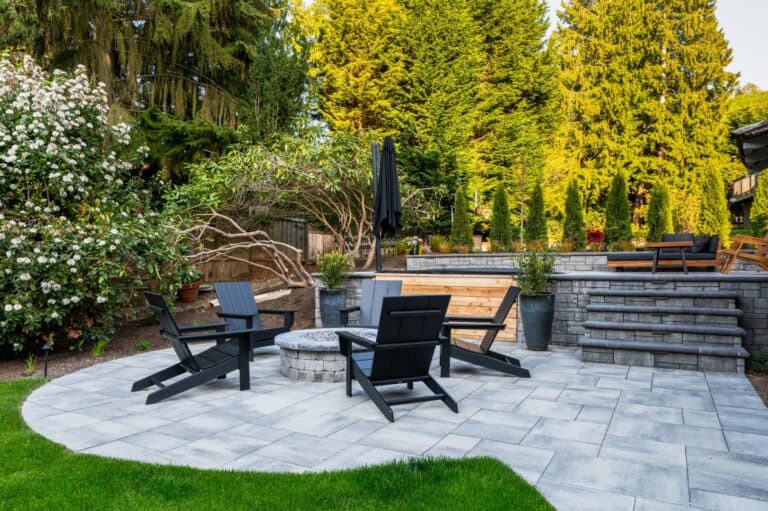
- Design the entire property first, then divide into phases — never phase without a master plan, or you risk rework that costs more than doing it right the first time.
- Phase 1 is always infrastructure: drainage, grading, retaining walls, and underground utilities. These elements cannot be retrofitted without disrupting everything built above them.
- Stub out all underground utilities — irrigation, electrical conduit, gas lines — during the phase when trenches are open. The cost difference between running conduit now versus trenching through finished hardscape later is significant.
- Lock material specifications across all phases at the design stage. Stone and manufactured products can be discontinued or change in color between production runs.
- Each completed phase should look and function as a finished landscape, not a construction zone waiting for the next season.
- Work with the same [design-build team](/services/design-build/) across all phases to maintain design continuity, site knowledge, and material consistency.
Why Would You Phase a Landscape Project Instead of Building It All at Once?
The most common reason is straightforward: the landscape you want costs more than you want to spend in a single year. For homeowners across Kirkland, Bellevue, and Sammamish, a full-property transformation that includes grading, drainage, hardscape, structures, irrigation, lighting, and planting can represent a significant investment. Spreading that investment across two or three years makes financial sense for many families — particularly when the alternative is scaling back the design to fit a single-year budget.
But there are other legitimate reasons to phase:
- Seasonal construction windows. Seattle’s reliable construction season runs roughly April through October. A large project that would take five or six months of continuous work may benefit from being split across two seasons rather than racing against November rains.
- Permitting timelines. In cities like Kirkland and Bellevue, permits for retaining walls, significant grading, or work near sensitive areas can take weeks or months to process. Phasing allows early-phase work to proceed while later-phase permits are in review.
- Living in the space. Some homeowners want to experience the first phase — use the patio through a summer, see how the drainage performs through a winter — before committing to the next investment. This is a reasonable approach, and a good design anticipates it.
- Life circumstances. A job transition, a child heading to college, a remodel happening simultaneously inside the house. Phasing accommodates the reality that a landscape project does not exist in isolation from the rest of your financial life.
What phasing is not: a way to avoid committing to a comprehensive design. The master plan is the non-negotiable foundation. Without it, you are not phasing — you are improvising.
What Happens When You Phase Without a Master Plan?
This is the scenario Classic’s crews encounter most often when we inherit a project from a previous company or from a homeowner who hired different contractors for different pieces over several years.
The symptoms are predictable:
- Drainage conflicts. A patio installed in Year 1 directs water toward the foundation because no one planned the grading for the retaining wall that was supposed to go in during Year 2. Now the retaining wall design has to work around existing hardscape, and the drainage solution costs more than it would have if everything had been graded at once.
- Utility interference. Irrigation lines run directly through the footprint of a future outdoor kitchen. Electrical conduit for landscape lighting was not stubbed out during the initial construction, so running it later means cutting through finished surfaces.
- Aesthetic disconnection. The stone selected for the front walkway in Year 1 is discontinued by Year 3 when the back patio goes in. The planting palette shifts because a different designer was involved. The property looks like three separate projects happened to land on the same lot.
- Structural redundancy. A small retaining wall built in Phase 1 has to be demolished to accommodate the larger wall system that the full design actually requires. Money spent, then spent again.
The pattern is consistent: work that has to be undone later always costs more than work that was planned from the beginning. On Eastside properties with slopes, clay soils, and mature tree canopy, the cost of rework compounds quickly because site access, drainage routing, and root protection add complexity to every change.
What Does a Master Plan for Phasing Actually Include?
A design-build master plan for a phased project includes everything a single-phase design would include — the difference is in how the construction documents are organized and sequenced.
### How Is the Full Design Organized for Phased Construction?
The design team produces a complete set of construction documents for the entire property, then divides them into phase packages. Each package includes:
- Grading and drainage plan for the full site. Even if grading only happens in Phase 1, the plan accounts for the finished grades of all future phases. This is the single most important document in a phased project. Getting drainage wrong in Phase 1 creates problems that every subsequent phase has to absorb.
- Utility master plan. Irrigation mainlines, electrical conduit, gas lines for a future fire pit, low-voltage wiring for lighting — all stubbed out or roughed in during the phase when the ground is open. The incremental cost of running a conduit while trenches are already open is minimal. The cost of trenching through a finished patio to run that same conduit later is not.
- Material specifications locked for all phases. Stone, pavers, and manufactured materials are specified at the design stage, not at each phase’s construction stage. If a particular basalt is central to the design, the specification includes backup materials in case of discontinuation. Color-matching across years requires this level of forethought.
- Planting plan with establishment sequencing. Some plants take three to five years to reach their intended scale. A phased planting plan may front-load certain anchor plantings — specimen trees, screening evergreens, structural shrubs — so they are establishing while later hardscape phases are constructed around them.
- Phase boundary definitions. Each phase has clean start and stop points that leave the landscape usable and visually complete at every stage. A well-phased project should not look “unfinished” at any point — each completed phase should feel intentional, not partial.
Which Phase Should Come First?
The sequencing of a phased landscape project follows a logic dictated by gravity, utilities, and access — not by which area of the yard you most want to use first.
### What Typically Goes Into Phase 1?
Phase 1 is almost always the infrastructure phase. It includes the work that is expensive, invisible, and impossible to retrofit without disrupting everything above it:
- Grading and drainage. Establishing the finished grades for the full property, installing French drains, catch basins, and drainage routing to daylight or municipal stormwater connections. On Eastside properties with clay soils and slopes, this is non-negotiable as a first phase. Water does not wait for your construction schedule.
- Retaining walls. Any structural walls that affect grade changes across the property. A retaining wall is not a cosmetic feature you add later — it is a structural element that determines what can be built above and below it.
- Underground utilities. Irrigation mainlines, electrical conduit for future lighting, gas line stubs, and any underground water features plumbing. These go in while the ground is open.
- Primary hardscape. The patio, walkways, or outdoor living area that anchors the design. This gives the homeowner a usable, finished space from Day 1 and establishes the design vocabulary — the stone, the line quality, the proportions — that all subsequent phases will echo.
### What Goes Into Phase 2?
Phase 2 typically builds on the infrastructure that Phase 1 established:
- Secondary hardscape. Steps, seat walls, fire pit areas, or secondary pathways that connect to the Phase 1 structures.
- Landscape lighting. The conduit was roughed in during Phase 1. Now the fixtures go in, transforming the property at night and adding security. Because the wiring is already in place, this phase is significantly less disruptive than it would be as a standalone project.
- Screening and privacy plantings. Evergreen hedges, ornamental trees, and layered plantings that define spatial boundaries. Front-loading these in Phase 2 gives them a full growing season before Phase 3 fills in the remaining plant palette.
- Irrigation completion. Mainlines are in from Phase 1. Phase 2 extends lateral lines and installs drip or spray zones for the areas now being planted.
### What Goes Into Phase 3?
Phase 3 is typically the refinement phase:
- Final planting. Perennial beds, groundcovers, seasonal color, and understory plantings that complete the design’s layered plant palette.
- Outdoor structures. Pergolas, arbors, or shade structures that complement the hardscape and planting already in place.
- Finishing details. Built-in seating, water features, edging, and the small elements that elevate the landscape from “well-built” to “designed.”
- Turf or lawn areas. If natural lawn is part of the design, installing it last prevents construction traffic from destroying new sod or seed during earlier phases.
This sequence is not rigid. A homeowner in Woodinville whose primary goal is a private backyard retreat might prioritize screening plantings in Phase 1 alongside drainage, then tackle the patio in Phase 2. The principle remains the same: infrastructure before aesthetics, underground before aboveground, structural before decorative.
How Do You Protect the Design Vision Across Multiple Years?
The master plan is the anchor — but a plan sitting in a drawer does not protect itself. Practical mechanisms that keep a multi-year project coherent include:
- Single design-build relationship. Working with the same company across all phases means the crew that built Phase 1 understands the design intent, knows the site conditions, and has a relationship with the materials and methods used. Switching contractors between phases introduces exactly the disconnection that phasing is supposed to avoid.
- Phase kickoff meetings. Before each phase begins, the design team walks the completed work, confirms the next phase’s scope, and identifies any adjustments needed based on how the landscape has performed since the last phase. Did the drainage route handle last winter’s rainfall? Have any plants failed that should be replaced before the next phase surrounds them?
- Material reservations. For natural stone and certain manufactured products, reserving or purchasing material for future phases during the initial order is sometimes possible and often advisable. A quarried basalt that is available today may not be available in the same color range two years from now.
- Budget documentation. The master plan includes estimated investment ranges for each phase, documented at the time of design. These are not binding quotes — material and labor costs shift over time — but they provide a realistic framework for financial planning. Homeowners who are budgeting for a backyard renovation across multiple years need this visibility to plan effectively.
How Does Phasing Affect the Total Cost?
Honest answer: a phased project typically costs somewhat more than the same project built in a single phase. There are real reasons for this:
- Mobilization costs. Each phase requires crew mobilization, equipment transport, and site preparation. Doing this once costs less than doing it three times.
- Material price escalation. Construction materials in the Seattle market have trended upward consistently. Stone, lumber, and manufactured products purchased in Year 3 will likely cost more than the same materials in Year 1.
- Temporary conditions. Between phases, temporary erosion control, edge treatments, and protective measures for completed work add cost that would not exist in a single-phase build.
- Reconnection work. Tying Phase 2 hardscape into Phase 1 hardscape requires careful demolition and reconstruction at the connection points, even when the design planned for it.
The premium for phasing varies by project, but the financial logic still works for many homeowners. Spreading the investment across years can be more manageable than a single large expenditure — and it is categorically better than building a scaled-down version of your design that you will want to tear out and replace in five years.
The key insight is that the design-build process absorbs much of the phasing overhead by maintaining continuity across phases. A design-build firm that designed the master plan, built Phase 1, and returns for Phase 2 does not need to re-learn the site, re-interpret the design, or re-establish quality standards. That continuity is where the model pays for itself.
How Long Should Each Phase Take?
In Classic’s experience across Eastside properties, a common phasing timeline looks like this:
- Phase 1: 4-8 weeks of construction, typically spring through early summer of Year 1
- Phase 2: 3-6 weeks of construction, spring of Year 2
- Phase 3: 2-4 weeks of construction, spring or fall of Year 3
Fall planting phases are particularly effective in the Pacific Northwest. Plants installed in September or October benefit from mild temperatures and consistent rainfall through winter, establishing root systems before the following summer’s dry period. A phasing strategy that front-loads hardscape in spring and schedules planting phases for fall takes advantage of Seattle’s climate rather than fighting it.
The gap between phases also matters. Allowing a full winter between Phase 1 and Phase 2 lets the drainage system prove itself under real conditions. It gives newly graded slopes time to settle. It reveals any areas where compaction or erosion need attention before the next phase builds on top of them.