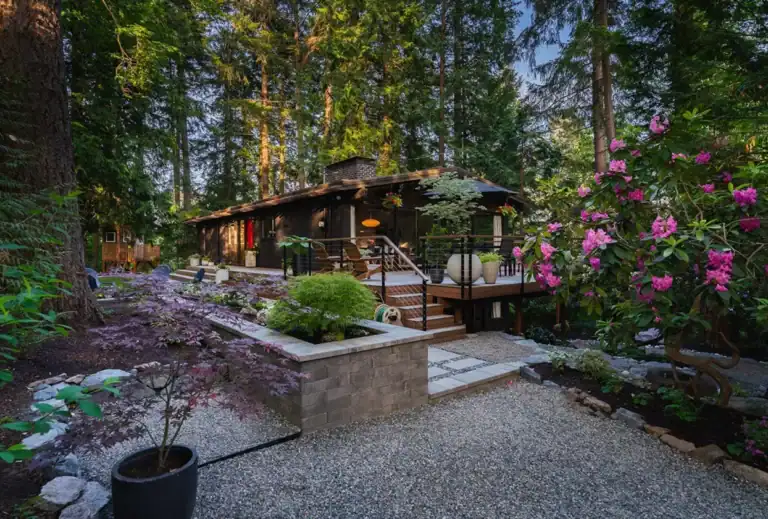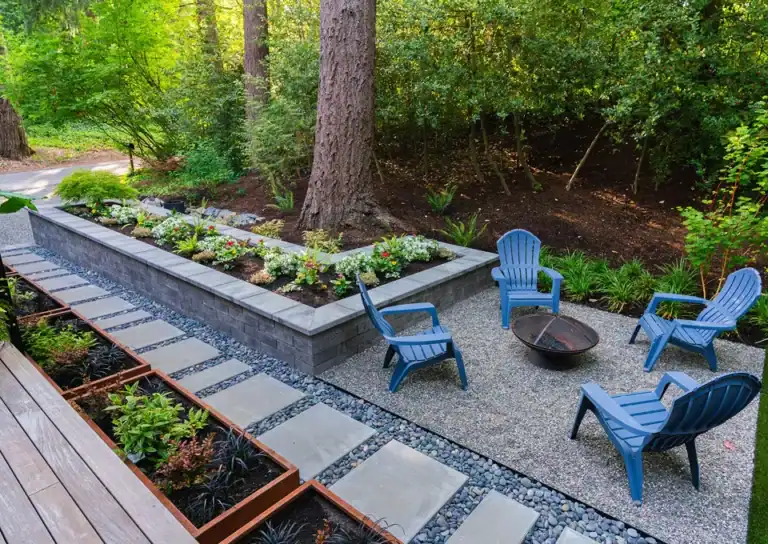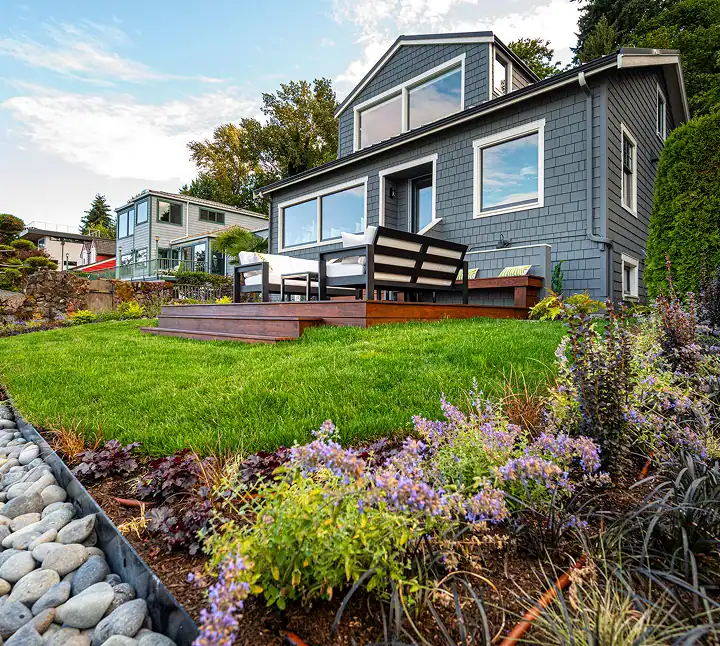
- The construction sequence is not random. Every installation follows a specific order — demolition, grading, drainage, hardscape, irrigation, planting, finishing — because each layer depends on the one beneath it.
- Your property will look worse before it looks better. Weeks two and three are typically the roughest visually — exposed soil, equipment on-site, torn-out materials. This is normal and temporary.
- Weather affects scheduling, not quality. Seattle rain may shift work days within a week, but Classic's crews do not rush through steps to compensate. Concrete cures, compaction standards, and planting conditions all get the time they need.
- The final walkthrough is not a formality. It is a structured handoff where Classic's project lead walks the entire property with you, reviews every element against the design plan, and creates a punch list for anything that needs adjustment.
- Communication happens throughout, not just at the beginning and end. Your project lead — typically your designer or a dedicated field manager — keeps you informed at key milestones, especially when the schedule shifts or decisions come up that were not anticipated in the original plan.
- Planting comes near the end for a reason. Installing plants before hardscape and grading are complete exposes them to damage from equipment, soil movement, and material staging. The sequence protects your investment.
Why Does the Installation Follow a Specific Order?
Landscape construction is not like interior remodeling where multiple trades can work in parallel across different rooms. Outdoors, almost everything happens on the same ground surface, and each phase literally builds on the one before it.
Drainage infrastructure goes in before hardscape because the pipe routes run underneath patios, walkways, and retaining walls. Hardscape goes in before planting because heavy equipment — skid steers, plate compactors, concrete trucks — would destroy anything green in their path. Irrigation lines go in after hardscape edges are set but before planting, because the heads need to be positioned relative to the finished grade, not the construction grade.
Skip a step or reverse the order, and the result is rework — digging up a new patio to fix a drainage line, replacing plants crushed by a concrete pour, or redoing irrigation after discovering the grade changed by three inches during wall construction.
In Classic’s experience across 2,000+ installations between Bellevue and Shoreline, the projects that go smoothest are the ones where the homeowner understands this sequence before day one. Not because they need to manage it — that is the project lead’s job — but because understanding the “why” behind the order makes the messy middle weeks far less stressful.
What Happens During Week One — Site Preparation and Demolition?
Week one is about clearing the canvas. Before anything new goes in, what needs to come out has to go first.
Depending on the project scope, this phase may include:
- Demolition of existing hardscape — old patios, cracked walkways, failing retaining walls, deteriorated decking. Materials are sorted on-site: concrete and masonry go to recycling, wood gets hauled, reusable stone gets set aside if the design calls for it.
- Plant and tree removal — plants identified for removal during the design phase come out. Classic’s team includes a Certified Arborist who evaluates tree health and root zones, and trees flagged for preservation get protective fencing installed before any heavy equipment enters the site.
- Access preparation — establishing the route that trucks and equipment will use to enter and exit the property. On many Eastside properties with narrow side yards, sloped driveways, or shared easements, this is not trivial. The access plan gets figured out before construction starts, not on the first morning.
- Material staging — identifying where bulk materials (gravel, soil, stone, pavers) will be stored during the project. This area typically occupies a section of the driveway or a designated zone in the yard.
- Temporary erosion control — on sloped properties or sites near sensitive areas, silt fencing or straw wattles go in per King County requirements before any soil is disturbed.
What your property looks like at the end of week one: Stripped back. Bare soil where lawn or old plantings were. Possibly a dumpster in the driveway. Equipment parked on-site or staged nearby. If you are the kind of person who finds demolition exciting — the old, tired landscape finally going away — this week can feel energizing. If you are more attached to what was there, it can feel unsettling. Both reactions are normal.
What Happens During Weeks Two and Three — Grading, Drainage, and Subgrade?
This is the foundation phase, and it is the most important work that happens on the entire project. It is also the phase that looks the least impressive.
### How Does Grading Work on Seattle Properties?
Grading means reshaping the ground surface to achieve two things: proper drainage away from the house and structures, and the correct elevations for all the hardscape and planting areas in the design.
On many properties between Kirkland and Issaquah, the existing grade was never correct to begin with — or it shifted over decades as soil settled, tree roots lifted surfaces, and previous landscapers added material without regard for drainage patterns. Classic’s crews use laser levels and string lines to establish finish grades across the entire project area before any material goes down.
### What About Drainage Infrastructure?
Drainage goes in during this phase because the pipe runs below everything else. This typically includes:
- French drains along retaining walls and low areas where water pools
- Catch basins at low points in hardscape areas
- Downspout connections routing roof water away from the foundation and into the storm system or dry wells
- Subsurface drain lines connecting all collection points to a discharge location
In the glacial till soils common across the Eastside, subsurface drainage is not optional — it is structural. Water that cannot drain through clay-heavy subsoil builds hydrostatic pressure behind retaining walls, undermines paver bases, and saturates root zones. The drainage work done in weeks two and three is what separates a landscape that performs for twenty years from one that starts failing in three.
### What Does the Subgrade Preparation Involve?
After grading and drainage, the subgrade for all hardscape areas gets prepared. This means excavating to the correct depth (typically 8 to 12 inches below finished paver or stone surface, depending on soil conditions and load requirements), then placing and compacting crushed rock base material in lifts — usually two to three layers, each compacted independently.
Eric Lemus, who has over 20 years in the industry and 10+ with Classic, oversees the hardscape construction sequence. The compaction standards his crews follow are not arbitrary: each lift gets verified with a plate compactor to achieve the density needed to prevent settling. Cutting this step short — compacting in one thick layer instead of multiple thin ones — is the most common cause of paver settling that Classic sees when evaluating work done by other companies.
What your property looks like at the end of week three: This is the low point visually. Exposed subsoil, gravel piles, drainage trenches, possibly standing water in excavated areas if it has rained. Equipment tracks everywhere. The yard looks like a construction site because it is one. If your neighbor asks “what are they doing to your yard?” — this is the week it happens. The honest answer: building the foundation that everything beautiful will sit on.
What Happens During Weeks Three Through Five — Hardscape Construction?
Once the subgrade is prepared and drainage is in, the visible transformation begins. Hardscape construction is where the design starts to take physical shape, and it is usually when homeowners go from anxious to excited.
### What Goes In During This Phase?
- Retaining walls — built from the lowest elevation up, with proper drainage backfill behind each wall. Wall construction is structural work: footings, setback calculations, geogrid reinforcement on walls over 3 feet, and drainage aggregate behind the wall face.
- Patios and walkways — paver or natural stone surfaces installed on the compacted base. Edge restraint goes in first to define the perimeter, then the setting bed (typically 1 inch of sand or screenings), then the surface material, then joint sand or polymeric sand.
- Steps and transitions — wherever the design changes elevation, steps connect one level to another. These are often the most detail-intensive elements because they have to be level, properly proportioned, and visually integrated with adjacent walls and surfaces.
- Seat walls, fire pit structures, outdoor kitchen bases — any built-in features that are part of the hardscape package.
### How Does Weather Affect Hardscape Work?
Seattle’s climate means rain is a factor from October through May — and sometimes in June. Classic’s crews work in light rain for many tasks (wall construction, excavation, base preparation), but certain steps require dry conditions. Concrete pours, polymeric sand installation, and some stone-setting adhesives need a dry window. When the forecast shows a wet stretch, the schedule adjusts. Your project lead communicates these shifts as they happen — you are never left wondering why the crew did not show up.
What your property looks like during this phase: The transformation is visible. Walls rising, patio surfaces appearing, the spatial layout of the design becoming real for the first time. This is when most homeowners start taking photos. The contrast between the chaos of weeks two and three and the emerging structure of weeks four and five is dramatic.
What Happens During Weeks Five and Six — Irrigation, Planting, and Softscape?
With hardscape complete and equipment off the planting areas, the landscape comes to life.
### Why Does Irrigation Go In Before Plants?
Irrigation lines, heads, and drip zones get installed after hardscape edges are established but before any plants go in. The reason is practical: irrigation heads need to be positioned relative to finished surfaces and planting bed edges. Installing irrigation after planting means disturbing root zones, damaging new plants, and working around foliage instead of on open ground.
Classic’s irrigation layouts are designed around the specific plant palette — not a generic grid. Drip emitters for shrubs and perennials deliver water at the root zone. Rotary heads for lawn areas provide even coverage with minimal overspray onto hardscape. Each zone is mapped to the water needs of the plants it serves, which is why the irrigation plan is drawn alongside the planting plan, not after it.
### What Does the Planting Process Look Like?
Planting follows a deliberate sequence:
- Soil preparation — amending planting beds with compost and organic matter. The native soils across most of the Eastside are heavy on clay and low on organic content. Classic’s standard practice is to incorporate 3 to 4 inches of compost into the top 8 to 12 inches of soil in planting beds — consistent with Washington State University Extension recommendations for establishing ornamental plantings in Western Washington.
- Tree installation — largest plants go in first because they require the most space for equipment access and root ball placement.
- Shrub and perennial installation — working from the back of beds forward, larger plants first, smaller plants and groundcovers last.
- Mulch application — 2 to 3 inches of arborist-chip or bark mulch across all planting beds. Mulch goes on after planting is complete, not before — burying a plant’s root flare under mulch is a common installation mistake that leads to trunk rot.
- Lawn installation — sod or seed, depending on the design. Sod provides an instant finished look; seed is more economical for large areas but requires 6 to 8 weeks of establishment before it looks like a lawn.
What your property looks like during this phase: Green returns. The contrast is striking — yesterday it was walls, stone, and bare soil; today there are trees, shrubs, and texture. Planting day is typically when the vision the homeowner has carried since the design phase becomes tangible for the first time. In our experience, this is the moment most homeowners say “now I see it.”
What Happens in the Final Weeks — Lighting, Details, and Walkthrough?
The last phase covers the finishing elements that elevate a landscape from built to complete.
### What Final Details Get Installed?
- Landscape lighting — path lights, uplights on trees, wall wash lights on architectural features, step lights for safety. Wiring runs are planned during hardscape construction, but fixtures go in last to avoid damage during planting and mulching.
- Final grading adjustments — smoothing any areas disturbed during planting, ensuring positive drainage across all surfaces.
- Furniture and accessory placement — if the project includes outdoor furniture, planters, or decorative elements, they go in after everything else is finished and clean.
- Site cleanup — all construction debris, excess materials, and equipment removed. The driveway and street frontage are cleaned. The property should look like a crew was never there — except for the new landscape.
### What Does the Final Walkthrough Cover?
The final walkthrough is a structured process, not a casual glance. Classic’s project lead walks the entire property with the homeowner, and the review covers:
- Every element in the design plan — hardscape surfaces, walls, plantings, irrigation zones, lighting fixtures — checked against the approved design. If anything does not match or does not meet the standard, it goes on the punch list.
- Irrigation system demonstration — the project lead runs through every zone, shows the controller operation, explains the watering schedule, and confirms coverage.
- Lighting walkthrough — ideally done at dusk so the homeowner can see the actual lighting effect, adjust fixture angles, and confirm the overall aesthetic.
- Plant identification and care notes — a review of the key plants in the landscape, their care requirements during the establishment period, and what to watch for in the first year.
- Maintenance handoff — whether the homeowner is taking over maintenance or transitioning to Classic’s maintenance program, the walkthrough includes specific guidance for the first 90 days. New plantings need consistent watering during their first growing season — the irrigation system handles most of this, but the homeowner needs to understand the schedule and recognize signs of under- or over-watering.
- One-year plant guarantee — Classic’s plant guarantee covers the first year. If a plant fails under normal conditions and proper watering during that period, it gets replaced.
The punch list — if there is one — gets scheduled and completed within 1 to 2 weeks of the walkthrough. No project is considered complete until the punch list is closed.
How Long Does the Whole Process Actually Take?
The week-by-week framework above represents a mid-sized design-build project — the kind that includes a patio, retaining wall, planting, irrigation, and lighting across a portion of the property. In practice, timelines vary:
| Project Type | Typical Duration |
|—|—|
| Patio + planting refresh | 3-4 weeks |
| Backyard transformation (hardscape + planting + lighting) | 5-7 weeks |
| Full-property design-build | 8-12 weeks |
| Multi-phase projects (front and back done in stages) | 10-16 weeks total |
Weather, permit timelines, and material lead times all affect the schedule. Classic’s project leads build buffer into the timeline for Seattle’s rain patterns — the schedule assumes some wet days, not a perfectly dry stretch.
For a deeper look at project timelines from first call through completion, see How Long Does a Classic Landscape Project Take?
What Should Homeowners Expect During the Messy Middle?
This deserves its own section because it is the number one source of anxiety for homeowners during installation — and the number one thing that catches people off guard if nobody prepares them for it.
Weeks two and three of most installations are visually rough. The old landscape is gone. The new one has not arrived yet. What is visible is dirt, gravel, equipment, and trenches. If it rains — and in Seattle, it will — add mud to that picture.
Here is what helps:
- Know it is temporary. The messy phase typically lasts 7 to 14 days. It ends when hardscape starts going in.
- Stay off the work area. Compacted subgrade and drainage trenches are not meant for foot traffic. Pets and children should be routed away from the construction zone.
- Trust the sequence. The foundation work happening during the ugly phase is what makes the finished landscape durable. Rushing through it to “get to the pretty part” is how projects fail in three years.
- Talk to your neighbors. A quick heads-up that construction is happening — along with an approximate timeline — goes a long way. Classic’s crews are respectful of neighboring properties, but noise, trucks, and dust are part of the process.
- Communicate with your project lead. If something feels wrong or you have a question, ask. That is what the project lead is there for. In Classic’s design-build model, the person who manages your project works for the same company that designed it and the same company whose crews are building it. There is no finger-pointing between separate firms.