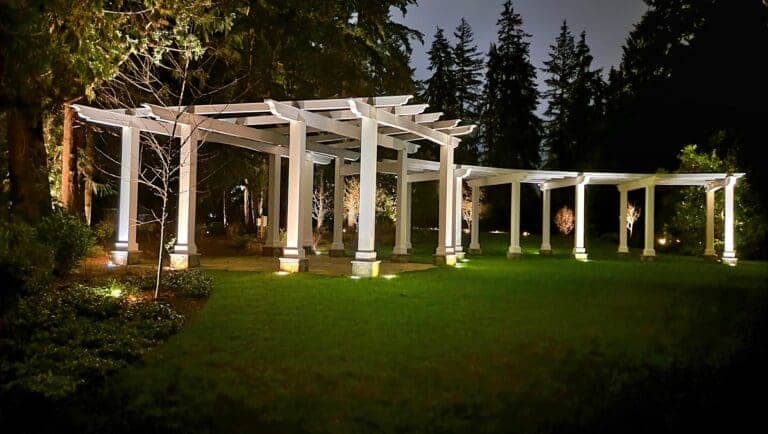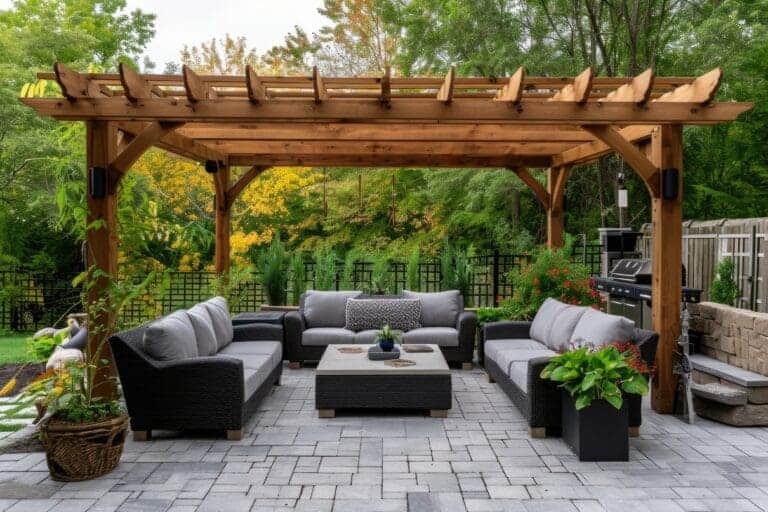
- Overhead cover is the single highest-impact investment for year-round outdoor use in Seattle — it transforms a 4-month patio into a 10–11 month living space by handling our persistent light rain.
- A gas fire pit extending 60,000–90,000 BTU of radiant heat makes outdoor seating comfortable down to the low 40s°F, adding 2–3 usable months on each end of the season.
- Wind screening on the southwest exposure — using plantings, glass panels, or partial walls — prevents heat loss and is the most commonly overlooked element in outdoor living room design across Bellevue, Kirkland, and Redmond.
- Comprehensive landscape lighting with path, accent, overhead, and task layers is not decorative — it's the difference between losing the space at 4:15 PM in December and using it year-round.
- Define outdoor "rooms" through elevation changes, planting borders, material transitions, and overhead plane shifts rather than relying on furniture arrangement alone.
- Design for year-round use from the start — retrofitting a cover structure, fire feature, or lighting system costs 20–40% more than integrating them into the original build.
Seattle’s climate is far more forgiving than its reputation suggests. Average winter lows hover around 36–38°F — rarely below freezing. Summer highs rarely exceed 85°F. The challenge isn’t temperature extremes; it’s the six months of gray, drizzly days between October and March that convince homeowners their backyard is a seasonal luxury. It isn’t. With intentional design — covered structures, fire features, wind screening, and thoughtful lighting — an outdoor living room in the Seattle area can function comfortably from early March through late November, and a well-sheltered space stays usable even through January. We’ve designed outdoor rooms across Bellevue, Kirkland, Redmond, and Sammamish that homeowners tell us they use 10–11 months of the year. The difference between a backyard that gets abandoned in October and one that stays alive through winter isn’t luck or climate — it’s design decisions made before the first paver goes down.
What makes an outdoor space usable year-round in Seattle?
Three elements determine whether an outdoor living room works beyond summer: overhead cover, radiant warmth, and wind protection. Get all three right and you have a space that handles everything our climate throws at it except the handful of days each winter when temperatures genuinely drop below freezing or wind speeds make any outdoor gathering uncomfortable.
Overhead cover is the single most impactful investment. Rain in the Seattle area isn’t typically heavy — it’s a persistent light drizzle that makes uncovered spaces feel damp and unwelcoming. A solid-roof pergola, a pavilion, or even a well-designed patio cover with gutters transforms the experience. You’re not huddling under shelter to escape a downpour — you’re sitting comfortably while the rain falls softly around you, which is actually one of the more pleasant sensory experiences our climate offers.
Radiant warmth extends the season by two to three months on each end. A fire pit or outdoor fireplace provides both heat and a focal point that draws people together. On a 45°F November evening in Kirkland, a gas fire feature puts off enough radiant heat to make the surrounding 8–10 foot radius genuinely comfortable with a light jacket. Overhead radiant heaters — the kind mounted to a pergola beam or a pavilion ceiling — add another layer when temperatures drop further.
Wind screening is the element most homeowners overlook, and it’s the one that determines whether a covered, heated space actually feels warm or whether the heat dissipates before it reaches anyone. In most Greater Seattle neighborhoods, the prevailing wind comes from the southwest. Orienting an outdoor room so that its open face looks away from the southwest — or installing screening on the windward side using plantings, partial walls, or glass panels — makes a measurable difference.
On a Kirkland property near Juanita Beach, the homeowners had an existing covered patio with a gas fire pit — on paper, the setup for year-round use. In practice, they told us they abandoned it by October every year because the southwest wind funneled between their house and the neighbor’s, creating a wind tunnel effect that made the fire pit feel useless. The heat would literally blow sideways off the patio. We added a combination of a half-height stone wall on the windward side (about 42 inches — high enough to block the wind at seated height, low enough to preserve the view) and a row of Thuja plicata ‘Green Giant’ along the property line behind it. Within one season, the evergreens were dense enough to further diffuse the wind above the wall line. The homeowners told us they were still using the patio in December that year — something they hadn’t done once in the previous three winters with the same fire pit and the same cover overhead. The only change was blocking the wind.
How do you design distinct outdoor "rooms" instead of just a patio?
The difference between a patio and an outdoor living room is the same difference between an open-plan warehouse and a home with defined spaces. Both have square footage — only one has rooms.
We define outdoor rooms using four tools:
Elevation changes
Even a single step — 6 to 8 inches — signals to the brain that you’ve moved from one space to another. A sunken fire pit area, a raised dining platform, or tiered levels stepping down a slope each create natural boundaries without walls. In our Kenmore project, the slope of the lot allowed us to create four distinct outdoor rooms on different levels: a family lawn, a fire pit gathering area, an entertainment patio, and a private master patio — each connected by hardscape pathways but each feeling like its own destination.
Planting as walls
A 6-foot Emerald Green arborvitae hedge defines a space as clearly as a fence but with far more texture, seasonal interest, and acoustic softening. Mixed evergreen borders — combining, say, Prunus laurocerasus ‘Schipkaensis’ for density with Acer palmatum ‘Sango-kaku’ for winter color — create enclosure without monotony. We use plantings to separate cooking areas from lounging areas, to screen views of the neighbor’s garage, and to create the sense of arrival when you step from the house into the outdoor living space.
Material transitions
Switching from one hardscape material to another — poured concrete for the cooking area, natural stone for the lounge, decomposed granite for a pathway — tells people they’ve entered a different zone. This is both aesthetic and functional: the cooking area gets a material that’s easy to clean, the lounge gets something warmer and more textured underfoot, and the pathway gets a material with a different sound and feel that signals movement.
Overhead plane changes
A covered dining area adjacent to an open-sky fire pit creates two distinct rooms without any vertical separation. Adding a canopy of string lights over one zone and uplighting on trees in another reinforces the distinction after dark. The ceiling — or lack of one — is one of the most powerful room-defining tools in outdoor design.
What materials handle Seattle's wet climate without deteriorating?
Material selection is where outdoor living rooms in the Seattle area succeed or fail over time. We get roughly 37 inches of rain per year, and from October through April, surfaces stay damp for days at a stretch. The wrong material becomes slippery, stained, or structurally compromised within a few seasons.
Hardscape surfaces
Concrete pavers with a textured or tumbled finish provide reliable traction when wet — far safer than smooth-finished poured concrete, which becomes dangerously slick when damp. We typically install pavers over a minimum 6-inch compacted gravel base with a 1–2% slope away from structures. This base depth is critical in the clay-heavy soils that dominate Bellevue, Kirkland, and Redmond — cut it to 4 inches and you’ll see settling within two years as the clay shifts.
Natural stone — specifically basalt, bluestone, or granite — performs well in wet conditions and develops a rich patina over time. Sandstone and limestone are more porous and tend to grow moss faster in our climate, which creates both a maintenance burden and a slip hazard. In our experience, basalt and bluestone strike the best balance between aesthetics, safety, and longevity for outdoor living rooms west of the Cascades.
Porcelain pavers are gaining traction for covered areas — they’re essentially impervious to moisture absorption, which means no freeze-thaw cracking, no staining, and no moss growth. The trade-off is cost (typically 30–50% more than concrete pavers installed) and a more contemporary aesthetic that doesn’t suit every home.
Furniture and soft goods
Teak remains the benchmark for outdoor furniture in the Pacific Northwest. It handles moisture without rotting, develops a silver-gray patina if left unfinished, and lasts 20–30 years with minimal maintenance. The initial cost is significant — a quality teak dining set runs $3,000–$8,000 — but per-year cost over its lifespan beats aluminum or synthetic alternatives.
Powder-coated aluminum is the practical alternative: lightweight, rust-proof, and available in clean modern profiles. It won’t develop the warmth of teak, but it handles being left out in rain indefinitely.
All-weather wicker (HDPE resin woven over aluminum frames) works well for lounging pieces under covered structures. We don’t recommend it for fully exposed areas — UV degradation is slow but real, and while the material handles rain, cushions left out in Seattle’s persistent drizzle develop mildew quickly regardless of how “outdoor-rated” the fabric claims to be. Even Sunbrella-grade cushion fabric needs to be stored or covered when not in use during the wet season.
We don’t endorse specific furniture brands as a rule — what works depends on style, budget, and how exposed the space is. That said, in our experience, the teak pieces from Kingsley Bate and Gloster have held up consistently well on Greater Seattle properties over 10+ years. For powder-coated aluminum, we’ve seen good longevity from Brown Jordan and Fermob — the powder-coat quality varies significantly between manufacturers, and cheaper imported frames tend to show chipping at joints within 3-4 years in our climate. The honest recommendation: invest in the frame material and treat cushions as replaceable. Even the best outdoor fabric needs replacing every 4-5 years in Seattle’s wet conditions. Homeowners who accept that upfront tend to be happier than those who spend heavily on “forever” cushions and feel disappointed when mildew appears in year three.
Why is a fire feature the centerpiece of year-round outdoor living?
A fire pit or outdoor fireplace does something no other design element can: it gives people a reason to go outside when it’s 45°F and drizzling. The warmth is functional — radiant heat from a 60,000 BTU gas fire pit can make a 10-foot radius comfortable in temperatures down to the low 40s. But the draw is more than thermal. Fire is social infrastructure. It creates a focal point, orients seating naturally, and encourages people to linger in a way that a patio alone simply doesn’t.
Gas vs. wood-burning
In our experience, gas fire features are the right choice for roughly 80% of outdoor living rooms in the Seattle area, for practical reasons:
- Puget Sound Clean Air Agency regulations restrict wood burning during air quality events, which occur multiple times per season. A wood-burning fire pit you can’t legally light during poor air quality weeks in late summer and early fall defeats the purpose.
- Gas ignites instantly. No kindling, no smoke phase, no waiting 20 minutes for a usable fire. Homeowners who have to build a fire from scratch use the feature less often — convenience drives frequency of use.
- Gas produces no smoke. In a covered or semi-enclosed outdoor room, this matters enormously. Smoke under a roof structure is miserable.
- Gas allows precise heat control. A 60,000–90,000 BTU burner on a valve gives you adjustable warmth rather than the all-or-nothing intensity of a wood fire.
Wood-burning fire pits still make sense for open-air settings where the smoke disperses freely, where the homeowner genuinely enjoys the ritual of building a fire, and where the fire pit is positioned away from covered seating areas. The crackle and smell of a real fire creates an atmosphere gas can’t replicate — it’s a legitimate trade-off, not a lesser option.
Built-in vs. portable
For a true outdoor living room — the kind that functions as an extension of the home — a built-in fire feature is worth the investment. A custom gas fire pit built into a stone or concrete surround integrates with the surrounding hardscape, provides permanent seating walls, and anchors the room architecturally. On our Bellevue Raised Patio project, the built-in fire pit serves as the literal and social center of the outdoor living space, with the hot tub, seating areas, and plantings arranged around it. That kind of spatial organization isn’t possible with a portable unit.
Portable fire pits (the $200–$500 propane models from Costco) work fine for experimenting — figuring out where you actually gather and how much you use a fire feature before committing to a built-in. We encourage homeowners to spend a season with a portable unit before designing a permanent one. Where you think you’ll gather and where you actually gather are often different.
See more of our fire feature work in the Fire Pits design gallery.
How does lighting design extend outdoor living into Seattle's dark months?
From late October through February, the sun sets before 5:00 PM in the Seattle area. Without lighting, an outdoor room becomes unusable by mid-afternoon for half the year — regardless of temperature, shelter, or fire features.
Landscape lighting isn’t decorative. In the context of year-round outdoor living, it’s functional infrastructure that determines whether your investment gets used 6 months a year or 11.
Four layers of outdoor lighting
Path and step lighting keeps routes safe and defined. Low-voltage LED fixtures recessed into stair risers or set alongside walkways prevent trips and guide movement between zones. This is the non-negotiable baseline.
Accent and uplighting creates depth and visual interest. Uplighting a mature Western red cedar or a Japanese maple from the base transforms a dark yard into a dramatic backdrop. Silhouetting a specimen tree against a fence or structure adds architecture after dark that doesn’t exist during daylight. In neighborhoods like Clyde Hill, Medina, and Yarrow Point — where mature tree canopies dominate — uplighting turns the existing landscape into the scenery.
Overhead lighting — particularly string lights on a covered structure — creates the sense of a room with a ceiling. This is the single most effective lighting technique for making an outdoor space feel enclosed and intimate after dark. We typically run commercial-grade string lights (not the disposable big-box versions that fail after one season) on steel cable between pergola beams or post-mounted brackets. The warm glow defines the social space and creates an ambiance that overhead floods can’t match.
Task lighting serves specific functions: illumination over a cooking surface, a reading light near a lounge chair, accent lighting inside a fire feature surround. These are supplementary but they signal that the space is designed for actual use, not just appearance.
We standardize on 2700K color temperature for almost all residential landscape lighting — it produces the warm, amber-toned light that reads as inviting rather than clinical. The 3000K option has its place in modern and contemporary designs where the homeowner wants a crisper white light, but for most Greater Seattle properties surrounded by green foliage and warm-toned materials, 2700K is the natural choice. We use low-voltage (12V) LED fixtures almost exclusively — brands like FX Luminaire, Kichler, and WAC Lighting have been reliable across hundreds of installations. Low-voltage systems are safer (no buried high-voltage lines), more energy-efficient, and easier to adjust or expand after installation.
The homeowner reaction to the first evening walkthrough is one of the most rewarding moments on any project. On a Bellevue property, we finished the lighting installation on a Friday and asked the homeowners to wait until dark to go outside. They’d seen the landscape in daylight throughout construction. When they stepped onto the patio that evening and saw their mature Japanese maple uplighted for the first time — the branching structure casting shadows across the stone wall, the path lights leading through the plantings, the fire pit glowing in the background — the wife turned to us and said it felt like a completely different property. That reaction isn’t unique to one project. Lighting transforms a landscape more dramatically than almost any other element, and the impact is immediate.
Inspired to Start Your Project?
From concept to completion, we bring landscape visions to life across Greater Seattle.
Start Your DesignWhat outdoor living mistakes do we see most often in Seattle?
After four decades of designing and building outdoor spaces across Greater Seattle, certain patterns repeat:
Fully open spaces with no overhead cover
This is the most common one. A homeowner invests $30,000–$60,000 in a beautiful paver patio, quality furniture, and a fire pit — and then discovers they can only use it comfortably from June through September. Four months of return on a significant investment. Adding a cover structure after the fact is possible but costs 20–40% more than building it into the original design, because footings, posts, and drainage have to work around existing hardscape instead of being integrated from the start.
Ignoring the prevailing wind
An outdoor room that faces southwest — directly into Seattle’s prevailing wind — will feel exposed and cold even with fire features and overhead cover. Wind strips heat from the space faster than a fire pit can replace it. This is a siting decision that has to be made during design, not after construction. Rotating the orientation 90 degrees or adding a windscreen on the southwest exposure changes everything.
All grass, no gathering surface
A well-maintained lawn is a beautiful part of a landscape, but it’s not a living room. You need a hard surface — pavers, stone, concrete — to place furniture, create a dining area, and define a social zone. Grass under a dining table gets churned into mud by November. We see properties across Sammamish and Issaquah with expansive lawns and no dedicated hardscape gathering area, and the homeowners end up spending all their outdoor time on the deck adjacent to the house rather than in the yard they’re maintaining.
Underestimating darkness
Homeowners who design their outdoor space in July — when sunset is after 9:00 PM — forget that by December, it’s dark at 4:15 PM. A space designed without a lighting plan loses half the year to darkness. Lighting should be part of the original design, with conduit and wiring run during construction, not added as an afterthought with extension cords.
What does a year-round outdoor living room cost in the Seattle area?
Pricing varies significantly based on scope, materials, and site conditions, but here are the ranges we typically see for the key components:
| Component | Typical Range | Notes |
|---|---|---|
| Covered structure (pergola with solid roof) | $15,000–$40,000 | Depends on size, material (cedar vs. steel), and whether it’s attached to the house or freestanding |
| Built-in gas fire pit | $5,000–$15,000 | Includes gas line, stone/concrete surround, and fire glass or lava rock |
| Outdoor fireplace | $12,000–$30,000 | More structural, requires a deeper footing, provides more heat directionality |
| Paver patio (600–1,000 sq ft) | $18,000–$40,000 | Includes proper base, drainage, and edge restraint |
| Landscape lighting (comprehensive) | $8,000–$20,000 | Four-layer system with transformer, low-voltage LED, and smart controls |
| Wind screening (built) | $3,000–$12,000 | Glass panels, partial walls, or dense evergreen screening |
| Furniture (quality outdoor set) | $5,000–$15,000 | Teak or powder-coated aluminum; excludes cushions |
A complete outdoor living room — covered structure, fire feature, lighting, quality hardscape, and furnishing — typically ranges from $50,000 to $150,000 depending on complexity. That’s a wide range because the variables are real: a 200-square-foot covered patio with a portable fire pit is a fundamentally different project than a 1,000-square-foot multi-room outdoor living space with a fireplace, outdoor kitchen, and integrated lighting.
The cost-per-use math favors year-round design. A $60,000 outdoor space used 4 months a year delivers roughly 120 days of use. The same investment designed for year-round use — with cover, fire, and lighting — delivers 300+ days. The per-day cost drops by more than half.
These ranges are current for 2025-2026 across Greater Seattle. Material costs have stabilized after the 2021-2023 spikes, though labor and specialty trades (electrical, gas line, structural) continue to trend upward modestly. The one area where we’ve seen notable cost increases is covered structures — lumber pricing is stable, but the permitting and engineering requirements for attached pergolas and pavilions have become more involved in several Greater Seattle jurisdictions, which adds to the professional services portion of those projects.
What does a well-designed outdoor living room look like in practice?
Two Classic Landscaping projects illustrate the principles in action:
The Bellevue Raised Patio (view project) is a study in how a single level change and a central fire feature can organize an entire outdoor living space. The raised patio creates separation from the lawn below, the fire pit anchors the social zone, and the hot tub provides a secondary destination that extends use into the coldest months. The material palette — clean hardscape lines with naturalistic plantings softening the edges — keeps the space feeling intentional without being rigid.
The Kenmore Lakeview Remodel (view project) demonstrates the multi-room approach on a challenging slope. Four distinct outdoor rooms — family lawn, fire pit gathering, entertainment patio, and private master patio — are terraced into a hillside with Lake Washington views from every level. Each room has its own purpose, its own character, and its own relationship to the views and the planting. The homeowner didn’t get a patio — they got an entire outdoor floor plan.
Both projects started with the same question: how does this family actually want to live outdoors? The answer to that question — not the lot shape, not the budget, not the trend — drives everything.
For more on the design process and what different styles of landscape design look like in Seattle, see our guide to landscape design ideas, styles, and transformations. If you’re considering a design-build project that includes outdoor living, we’re happy to walk your property and talk through what’s realistic for your site.
The Bottom Line
Two Classic Landscaping projects illustrate the principles in action:
The Bellevue Raised Patio (view project) is a study in how a single level change and a central fire feature can organize an entire outdoor living space. The raised patio creates separation from the lawn below, the fire pit anchors the social zone, and the hot tub provides a secondary destination that extends use into the coldest months. The material palette — clean hardscape lines with naturalistic plantings softening the edges — keeps the space feeling intentional without being rigid.
The Kenmore Lakeview Remodel (view project) demonstrates the multi-room approach on a challenging slope. Four distinct outdoor rooms — family lawn, fire pit gathering, entertainment patio, and private master patio — are terraced into a hillside with Lake Washington views from every level. Each room has its own purpose, its own character, and its own relationship to the views and the planting. The homeowner didn’t get a patio — they got an entire outdoor floor plan.
Both projects started with the same question: how does this family actually want to live outdoors? The answer to that question — not the lot shape, not the budget, not the trend — drives everything.
For more on the design process and what different styles of landscape design look like in Seattle, see our guide to landscape design ideas, styles, and transformations. If you’re considering a design-build project that includes outdoor living, we’re happy to walk your property and talk through what’s realistic for your site.