- Terracing a Seattle backyard costs $8,000–$18,000 for a simple 2-level block wall project and $50,000–$120,000+ for multi-level engineered work with natural stone and hardscape
- DIY is reasonable if every wall is under 2 feet, you have easy access, and you're not triggering a permit — above that threshold, the rework cost of a failed wall exceeds the pro labor you'd save
- Drainage is not optional — 4-inch perforated pipe, gravel backfill, and filter fabric behind every wall. Skipping this is the #1 cause of retaining wall failure we see in Seattle
- Walls over 4 feet require a permit in most King County cities (Seattle, Bellevue, Kirkland, Redmond, Bothell) — add $2,000–$5,000 and 4–8 weeks for engineering and permitting
- Equipment access is the largest cost swing variable — tight side gates and limited backyard access can add 30–50% to labor
- Plant each terrace level according to its purpose — upper levels for sun-loving, drought-tolerant species; lower levels for shade or vigorous growers; slope faces for stabilizers like kinnikinnick
Terracing a sloped yard in Seattle typically costs $8,000–$18,000 for a simple two-level project with concrete block walls, and $50,000–$120,000+ for multi-level projects with natural stone, engineered walls, and integrated hardscape. Construction runs 2–4 weeks once the work starts. Design and permitting add another 4–8 weeks upfront if any wall exceeds 4 feet, which is where most King County jurisdictions trigger a building permit.
The harder question isn’t cost — it’s scope. Most Seattle homeowners who call us about terracing have already read a few weekend-project articles and are trying to decide whether to tackle it themselves or hire it out. The honest answer depends on one thing more than any other: whether your project crosses the line that triggers drainage engineering or a permit. Below that line, DIY is reasonable for the right person. Above it, the rework cost of doing it wrong exceeds the savings.
This guide covers what’s actually involved in terracing a Seattle slope, where the DIY/pro line really sits, and what projects across Bellevue, Kirkland, and the rest of Greater Seattle actually cost.
What does terracing a sloped yard actually involve?
A lot more than stacking blocks.
A properly built terrace is a system of five interacting parts, and every one of them has to be done right or the whole thing fails within a few seasons. Here’s the real sequence — not as a DIY recipe, but as an honest scope walkthrough so you can judge what you’re taking on.
1. Site analysis and design. Before any dirt moves, someone has to answer: How many levels make sense for this grade? How high can each wall be without triggering engineering? Where is the water going to go? For most Greater Seattle slopes we assess, the answer to “where does the water go” is the one that determines whether the project is a weekend job or a permitted, engineered build. Clay soils across Kirkland’s Finn Hill neighborhood and the cross-slope lots we see in Bellevue don’t drain on their own — which means walls have to be designed as drainage systems, not just soil retention.
2. Excavation and grading. Each terrace level has to be cut and filled to create a flat platform. On tight-access sites — side gates under 36 inches, no room for a mini-excavator — this shifts from equipment work to hand labor and adds 30–50% to the labor budget. This is the first hidden cost that surprises DIYers: renting a small excavator solves the excavation in two days; doing it by hand is a month of weekends and back problems.
3. Wall construction and drainage. Walls go in from the bottom up. Every wall needs a 4-inch perforated drain pipe at the base, clean crushed gravel backfill, and filter fabric to prevent sediment migration into the drainage stone. Skipping drainage is the single most common cause of retaining wall failure we see in Seattle. The wall looks fine the first winter. By the second winter, water saturates the soil behind it, hydrostatic pressure builds, and the wall starts to bow. By the third winter, it’s leaning. We’ve rebuilt more than a few walls that a homeowner or low-bid contractor installed without base drainage, and every rebuild costs more than the original done correctly.
4. Soil preparation and planting. Terrace soils are typically a mix of native soil and amendments. Each level gets graded to drain away from the wall, not toward it — a subtle but critical detail. Then irrigation, planting, and any hardscape (paths, steps, lighting) go in.
5. Steps and transitions. Connecting terraces with steps is both practical and a design opportunity. Natural stone steps, concrete block steps, or poured concrete all work well — the right choice depends on the overall design and budget. Each set of stone steps adds $1,500–$4,000 depending on width and material.
What all of this means in practice: terracing is a drainage engineering project with a landscape wrapped around it. The visible walls are the finished product. The invisible drainage, base preparation, and compaction are what decide whether the walls are still standing in five years.
Should I DIY this, or hire a pro?
This is the question worth being honest about — before you buy any block.
DIY is reasonable if ALL of these are true
- The tallest wall you’re building is under 2 feet
- Your slope is modest (under 15%) with no existing drainage issues
- The project is a single-level garden terrace — not multiple levels
- Your yard has easy equipment access (drive-up, no narrow side gates)
- Your total scope is under $5,000 in materials
- You have 40–60 available hours across 4–6 weeks (realistically, not aspirationally)
- You’re not triggering a King County building permit
That’s a real project for a handy, patient homeowner — and you can do it well.
Hire a pro if ANY of these are true
- Any wall over 3 feet — even if “technically” under the 4-foot permit threshold, the structural forces involved are beyond most homeowner skill levels
- Walls over 4 feet — these require permits and engineering in most King County cities (Seattle, Bellevue, Kirkland, Redmond, Bothell)
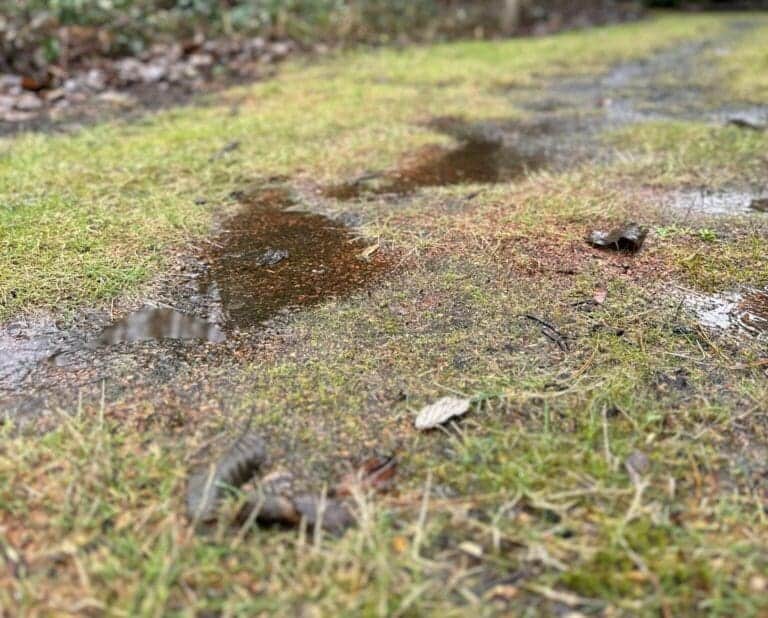
- Any existing drainage problem — water in the crawl space, saturated soil, pooling at the base of the slope. Fix this and the terracing together or the new work will fail.
- Multi-level projects with significant excavation or tight access
- Natural stone work — fitting irregular stone requires trained hands to look right and perform structurally. This is where most DIY stone walls look amateur and fail early.
- Sites with significant tree cover — root analysis before excavation is not optional if you want the trees to survive
The projects Seattle homeowners most regret attempting DIY are tiered walls with drainage issues. A wall that looks level the day it’s finished but lacks proper base preparation and drainage will shift or fail within a few seasons — and rebuilding costs significantly more than doing it right the first time.
In our experience across more than 3,000 Greater Seattle landscapes, the break-even logic is brutal: a professional crew can build in one week what takes a homeowner two months, and if anything structural goes wrong, we own the fix. On DIY projects, the fix is a second project.
How much does terracing a backyard cost in Seattle?
Real ranges, not marketing ranges. These reflect what we’ve seen across the past decade of Greater Seattle work.
| Scope | Approximate Cost |
|---|---|
| Simple 2-level terrace, concrete block walls, 30 linear feet, easy access | $8,000–$18,000 |
| Medium 3-level terrace, natural stone facing, 50 LF, moderate complexity | $25,000–$50,000 |
| Multi-level engineered terrace, steep slope, integrated hardscape, tight access | $50,000–$120,000+ |
What actually moves the number
- Equipment access — the single biggest variable. A walk-out backyard with a 10-foot gate is half the labor of a property with a 32-inch side gate and a retaining wall to reach the work area.
- Wall height — walls over 4 feet require engineering and permits. Expect $2,000–$5,000 for structural design and permit fees alone, independent of construction cost.
- Material choice — natural stone runs roughly 2–3× the installed cost of concrete block. A wall that’s $150/LF in concrete block is $350–$450/LF in natural basalt.
- Drainage complexity — if existing yard drainage is already compromised, it has to be corrected as part of the terracing. This adds cost but prevents the project from failing.
- Steps and hardscape — each set of stone steps adds $1,500–$4,000. Integrated lighting adds $2,000–$8,000 depending on scope. Flagstone paths between terraces add $25–$45 per square foot.
- Plant palette — a planted slope with mature native shrubs and a drip irrigation system runs $15–$30 per square foot of bed area.
The range is wide for a reason: the same 30 linear feet of wall can be a $9,000 weekend-crew job or a $35,000 engineered build depending on the variables above. If a bid looks radically lower than the rest, the difference is almost always being taken out of drainage, base preparation, or both — and that’s the part you can’t see until it fails.
A real Seattle terrace project: Kenmore Lakeview
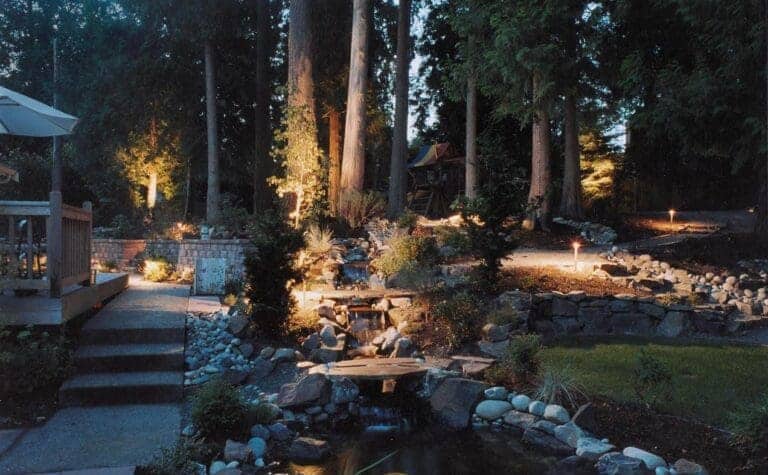
To anchor what the high end of this work looks like: one of our Kenmore projects turned a dramatically sloped backyard with erosion problems into a four-“room” outdoor living space with Lake Washington views. The scope included engineered retaining walls combining boulders and segmental block, slate paver patios across multiple levels, a concrete-surround fire pit, and integrated LED lighting. A geotechnical engineer was involved from the design phase forward because of the slope grade and King County’s permitting requirements at that scale.
The homeowners had lived with the slope as “unusable yard” for years. What they got back was four distinct, usable spaces — a dining level, a fire pit level, a garden walk, and a quiet morning coffee spot — connected by stone steps and plantings that stabilize the slope while framing the view.
Projects at this scale aren’t DIY candidates. They’re design-build projects where the wall engineering, permit submissions, and construction sequencing have to be coordinated by a single team. But they illustrate what the upper bound of terracing delivers when a slope is fully unlocked.
What design approaches work for Seattle slopes?
There are three that we use on most Greater Seattle terrace projects, and the right choice depends more on how you want to use the space than on the slope itself.
Formal terraces with hardscape walls
The most common approach: a series of level planting areas or usable spaces separated by low retaining walls. Wall heights run 18 inches to 4 feet per level, with the number of levels determined by total grade change and how you want to use each platform.
Materials that perform reliably in Pacific Northwest conditions:
- Concrete segmental block (Belgard, Allan Block, Versa-Lok) — consistent quality, wide color range, designed specifically to handle wet climates. Best cost-to-durability ratio for most projects.
- Natural basalt or granite — beautiful and timeless, blends naturally into PNW landscapes, 2–3× the installed cost of concrete block.
- Tumbled concrete block — softer, more naturalistic appearance than standard block. A good middle ground on cost with better aesthetics than new block.
Sloped terraces with planted slopes between levels
Instead of vertical walls between levels, you create sloped transitions planted with ground covers, grasses, or low shrubs. This approach works when total grade change is modest and you want a softer, more naturalistic look — closer to how a native PNW hillside looks than a structured garden.
Slope-stabilizing plants that perform reliably in Seattle:
- Kinnikinnick (Arctostaphylos uva-ursi) — native ground cover, handles dry summers well after establishment
- Shore juniper — low maintenance, spreading habit, tolerates slope conditions
- Ornamental grasses (Festuca, Carex) — root systems stabilize soil without being invasive
- Creeping phlox — attractive flowering cover for gentler slopes with good sun
Terraced lawn areas
For families who want usable grass on a sloped lot, terracing creates distinct lawn levels with low retaining walls between them. Each level can be small — a 12-foot wide play area works for many Greater Seattle lots — or more expansive. The walls double as built-in seating edges, which works naturally in outdoor entertaining spaces.
What plants work best on terraced levels?
Assign each level a purpose, then match plants to that purpose.
Upper terraces (most sun, best drainage): Lavender (Munstead performs reliably across Greater Seattle), rosemary, ornamental grasses, drought-tolerant perennials. Once established, these levels are often the lowest-maintenance parts of the yard.
Middle terraces (transition zones): Mixed shrub borders, flowering perennials, small ornamental trees — Japanese maples, vine maples, or serviceberry. These levels benefit from moderate moisture and support a wider plant palette.
Lower terraces (most moisture, richest soil): Ferns, hostas, astilbe, and other shade-tolerant plants if the house casts shadow. In sun, these levels support the most vigorous growers — hydrangeas, repeat-blooming roses, larger shrubs.
Wall faces and edges: Trailing plants like creeping Jenny, sedum, or low-growing thyme soften the transition between wall and planting bed and reduce the visual weight of taller walls.
Every plant in a Classic Landscaping design comes with a 1-year warranty — we match species to your specific sun exposure, soil, and terrace level, and we stand behind the selection.
What happens if you skip the permit or the drainage step?
The honest answer: you create a future problem, and you transfer it to yourself.
Skipping the permit (walls over 4 feet in most King County jurisdictions): You create an unpermitted structure on your property. When you sell the house, it shows up in inspection, and you either fix it at that point — sometimes requiring full demolition and rebuild — or the buyer negotiates the fix cost out of your sale price. King County and most city building departments have active enforcement on visible slope work, especially near property lines.
Skipping the drainage (4-inch perforated pipe, gravel backfill, filter fabric): You create a wall that looks fine for one to two wet seasons, then starts bowing. Hydrostatic pressure from saturated soil is one of the strongest forces a retaining wall faces in our climate, and it’s the force that proper drainage is specifically designed to relieve. Without drainage, the wall is fighting water weight instead of soil weight — and water always wins eventually.
Neither shortcut saves money. They shift cost from the original project to a future, more expensive fix.